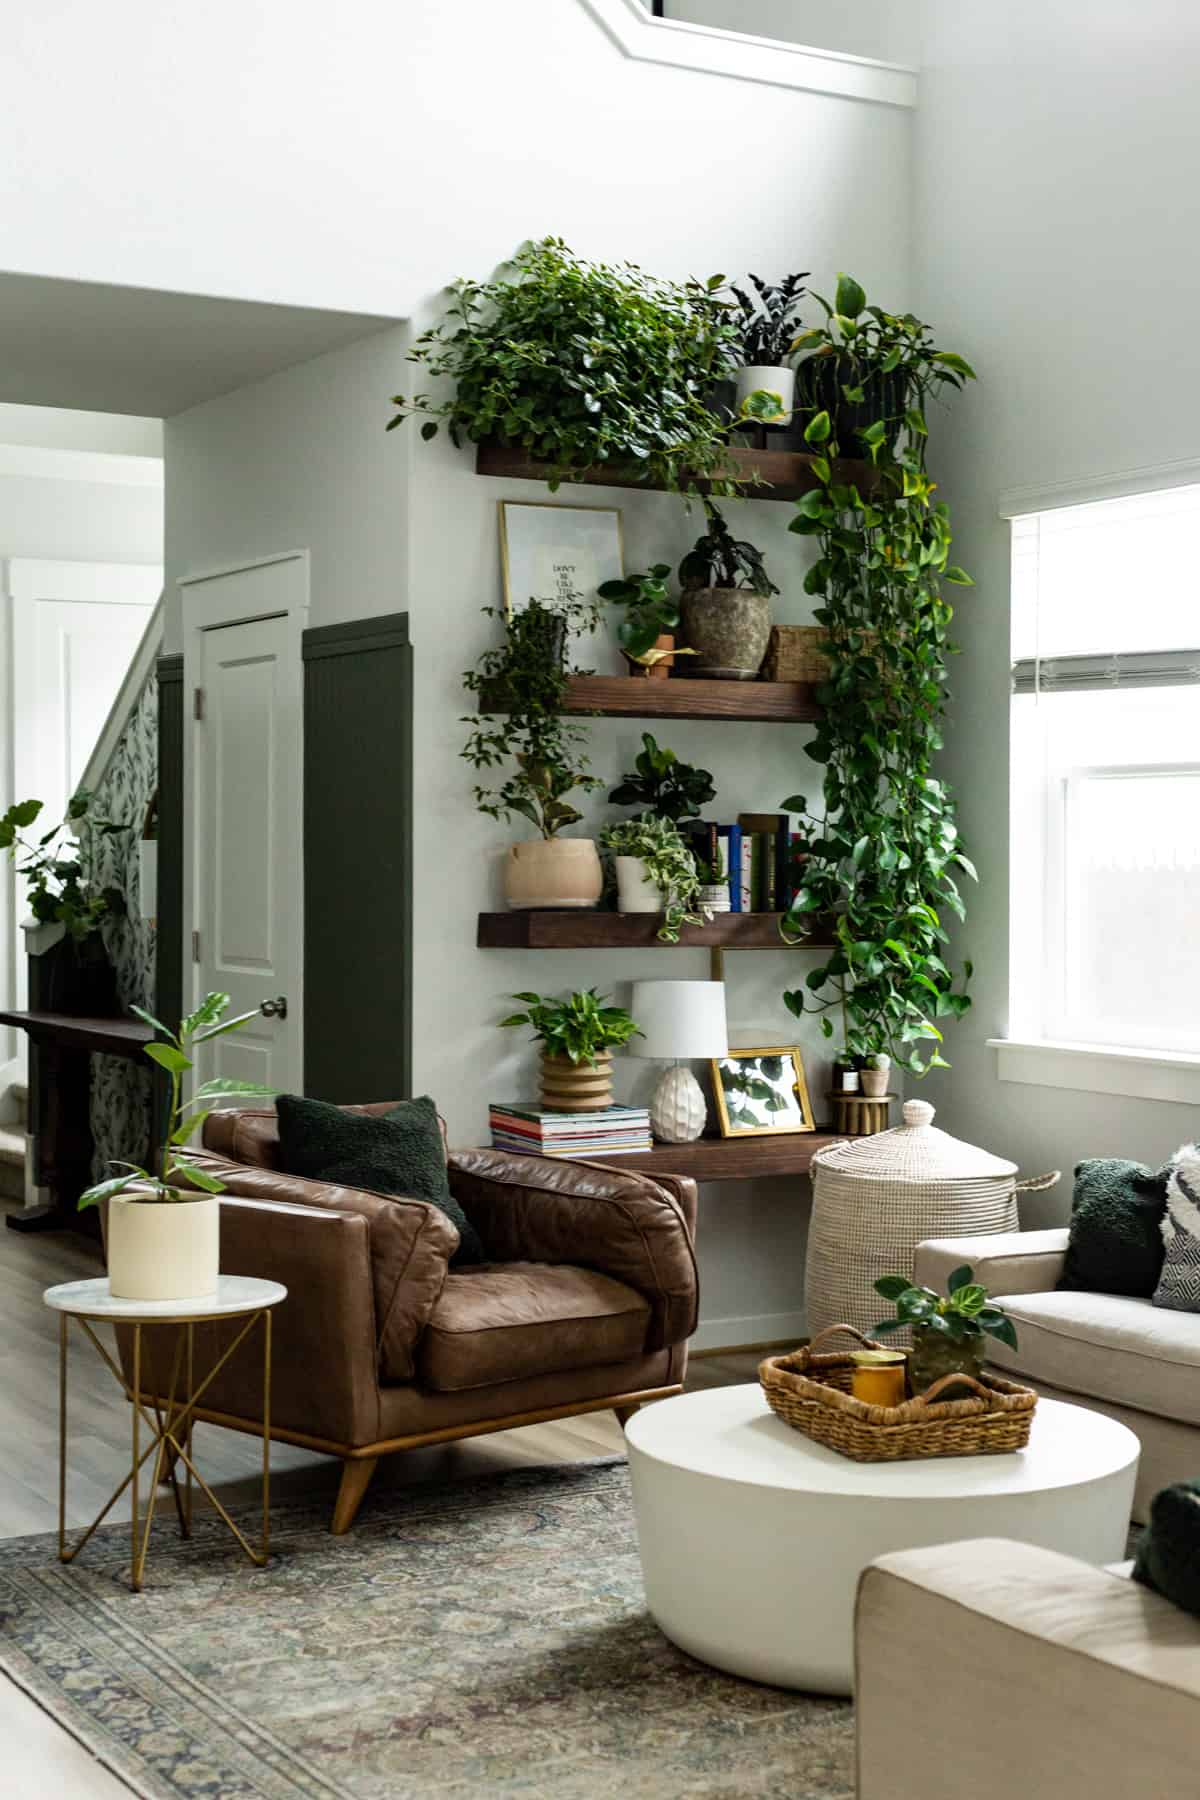
Wednesday, November 20, 2024

How to Create Stylish and Functional Plant Stands for Extra Profit

How to Create Stylish and Functional Plant Stands for Extra Profit

Turn Your Green Thumb into a Green Business: Creating Stylish and Functional Plant Stands for Extra Profit

If you’re a plant lover with a knack for DIY and an eye for design, you’ve got a recipe for success. Plant stands are an evergreen market, offering a unique opportunity to turn your passion into profit. By creating stylish and functional plant stands, you can tap into a growing demand for home décor that combines practicality and aesthetics.

The Market for Plant Stands

The houseplant trend is booming, fueled by a growing desire for indoor greenery and its positive impact on mental well-being. This translates into a thriving market for plant stands, with consumers looking for ways to display their plants creatively and enhance their home décor.

Crafting Stylish Plant Stands: Unleash Your Creativity

The beauty of plant stands is their versatility. You can explore various materials, designs, and sizes, catering to diverse tastes and budgets.

Embrace Diverse Materials

Explore a range of materials to create unique plant stands:

  • Wood: A classic choice, wood offers warmth and natural beauty. Consider reclaimed wood for an eco-friendly touch.
  • Metal: Metals like iron and copper lend a modern industrial vibe. You can paint them in vibrant hues or keep them raw for a rustic look.
  • Upcycled Materials: Repurpose old ladders, crates, or even wine barrels into stylish plant stands. This approach is both creative and sustainable.

Experiment with Designs

Play with shapes, sizes, and levels to create eye-catching plant stands:

  • Tiered Stands: Perfect for showcasing multiple plants, offering a cascading effect.
  • Geometric Shapes: Triangles, squares, and circles add a modern touch to your designs.
  • Hanging Stands: Ideal for space-saving and creating a whimsical feel. Use macrame or rope to create unique hanging planters.

Tailor to Different Needs

Consider the various plant sizes and styles that your target audience might have:

  • Small Stands: Ideal for succulents and small plants, perfect for coffee tables or desks.
  • Large Stands: Accommodate large ferns, palm trees, or even potted fruit trees.

Making Your Plant Stands Functional

Beyond aesthetics, functionality is crucial. Think about these factors:

  • Stability: Ensure your stands are sturdy and won't tip over, especially for heavier plants. Use robust materials and reinforce joints when necessary.
  • Drainage: Consider adding drainage holes to the base or platforms to prevent waterlogging.
  • Accessibility: Make it easy to care for the plants, allowing for watering, fertilizing, and repotting.

Marketing Your Plant Stands

Once your creative plant stands are ready, it’s time to attract buyers:

  • Online Marketplaces: Sell your stands on platforms like Etsy, Amazon Handmade, or Facebook Marketplace.
  • Local Craft Fairs and Markets: Showcase your creations at local events, engaging with customers directly.
  • Social Media: Use Instagram, Pinterest, or TikTok to showcase your plant stands and connect with potential customers.

Conclusion: Growing Your Green Business

By crafting stylish and functional plant stands, you can tap into a thriving market and grow a profitable business. Embrace your creativity, experiment with materials and designs, and cater to the unique needs of your customers. Remember, consistency in quality, marketing, and customer service are essential for success in this green endeavor. So, get ready to grow your own unique plant stand business and watch your profits blossom!

Tuesday, November 19, 2024

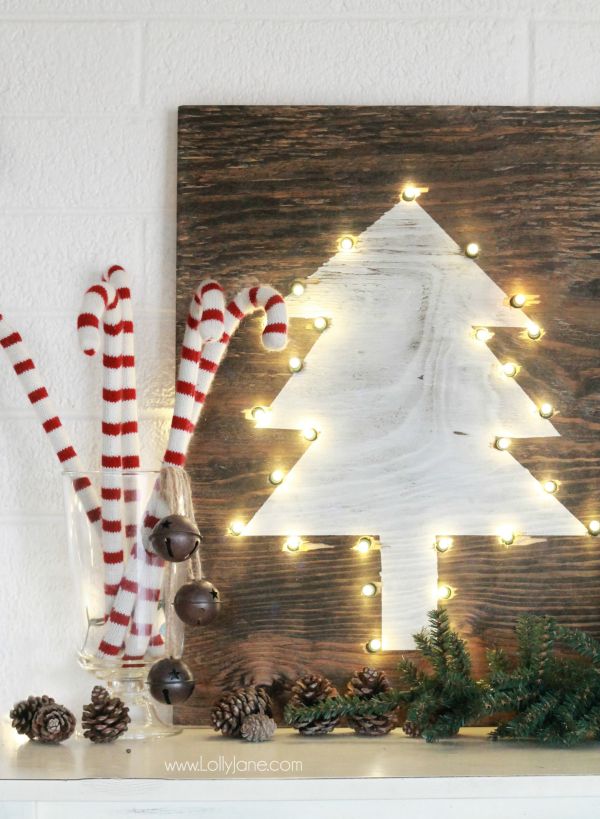
Budget-Friendly Christmas Wood Crafts for Beginners

Budget-Friendly Christmas Wood Crafts for Beginners

Budget-Friendly Christmas Wood Crafts for Beginners

Christmas is a time for celebration, joy, and spreading cheer. While the holiday season can be expensive, there are many ways to create festive decorations without breaking the bank. Wood crafts offer a unique and budget-friendly way to personalize your home and add a touch of warmth and rustic charm. This article will guide you through several simple wood crafts that are perfect for beginners, allowing you to create beautiful and meaningful Christmas decorations without requiring extensive woodworking skills or expensive materials.

Gather Your Supplies

Before diving into the projects, it's essential to gather your materials. Luckily, most of the items can be found at affordable prices at your local craft store or even repurposed from items you already have. Here's a list of general supplies:

Wood

  • Scrap wood: Look for leftover wood from home improvement projects or visit your local lumberyard for inexpensive scraps. Consider using plywood, pine, or cedar, as they are readily available and easy to work with.
  • Wooden dowels: These are perfect for creating ornaments, candle holders, or other small crafts.
  • Wooden rounds: You can find wooden rounds at craft stores or even cut your own from branches.

Tools

  • Saw: A handsaw or a jigsaw is sufficient for cutting wood. For smaller projects, a utility knife can be helpful for scoring lines.
  • Sandpaper: Use sandpaper to smooth the edges of your wood and give your crafts a polished finish.
  • Drill: A drill is essential for creating holes for hanging ornaments or attaching other components. If you don't own one, most hardware stores offer rental options.
  • Measuring tape and pencil: Use these to mark your wood accurately before cutting.
  • Clamps: Clamps help hold your wood pieces together securely while you work.
  • Safety goggles and gloves: Always protect your eyes and hands when working with wood.

Decorative Supplies

  • Paint: Acrylic paints are affordable and come in a wide variety of colors. Consider using festive colors like red, green, gold, and silver.
  • Stains: Wood stains add depth and warmth to your projects. Explore various finishes, such as walnut, mahogany, or cherry.
  • Brushes: You'll need brushes for applying paint or stain. Use different sizes for different areas.
  • Twine, ribbon, or string: These are perfect for hanging ornaments or adding a decorative touch.
  • Other embellishments: Get creative with your decorations! You can use glitter, sequins, buttons, pine cones, or dried fruit.

Simple and Beginner-Friendly Christmas Wood Crafts

1. Wooden Christmas Ornaments

Wooden ornaments are a classic and elegant Christmas decoration that can be customized to suit your style. Here's a simple guide:

  1. Cut out your desired shape from scrap wood. You can create stars, snowflakes, trees, or even reindeer. Use a template or draw the shape freehand.
  2. Sand the edges of your ornament to remove any rough spots and create a smooth surface.
  3. Paint your ornament in your chosen color or apply a wood stain for a rustic finish. Let the paint or stain dry completely.
  4. Drill a small hole at the top of the ornament for hanging. Attach a twine or ribbon to the hole.
  5. Add embellishments as desired. You can use glitter, sequins, or other decorative elements to personalize your ornament.

2. DIY Wooden Christmas Tree

A wooden Christmas tree is a unique and charming centerpiece for your holiday décor. Try this simple project:

  1. Cut three pieces of wood in triangular shapes of varying sizes. The largest triangle will be the base, and the smallest will be the top of the tree.
  2. Sand the edges of each piece of wood for a smooth finish.
  3. Paint or stain the triangles in your desired colors. You can use a traditional green for the tree or choose a more modern color like white or gold.
  4. Use wood glue to attach the triangles together, aligning the base of each triangle with the tip of the next smaller triangle. Make sure the glue is evenly distributed and clamp the pieces together until the glue dries.
  5. Decorate your tree with ornaments, lights, or other festive elements.

3. Wooden Candle Holders

Wooden candle holders create a cozy and inviting atmosphere. Here's a straightforward project:

  1. Cut wooden rounds or use pre-cut wooden rounds from your local craft store. You can choose various sizes to create a set.
  2. Sand the edges of the rounds for a smooth finish.
  3. Paint or stain the rounds in your desired colors. Consider using metallic paints or creating a distressed look with whitewash.
  4. Use a drill to create a hole in the center of each round, large enough to fit your candle.
  5. Add a layer of adhesive felt to the bottom of each round to prevent scratching surfaces.
  6. Place your candles in the holders and enjoy the warm glow.

4. Personalized Wooden Gift Tags

Give your gifts a personal touch with custom-made wooden gift tags. Follow these simple steps:

  1. Cut small rectangular pieces from scrap wood. Make sure the pieces are large enough to accommodate your message and a hole for hanging.
  2. Sand the edges of the tags for a smooth finish.
  3. Paint or stain the tags in your desired colors. Consider using festive colors like red, green, or white.
  4. Drill a hole at the top of the tag for hanging. Use a paint pen, permanent marker, or woodburning tool to write your message or a personalized greeting on the tag.
  5. Attach a twine or ribbon to the hole for hanging.

Tips for Success

Here are some additional tips to ensure your wood crafts are successful and enjoyable:

  • Plan ahead: Sketch out your design and measure your wood carefully before you start cutting.
  • Start simple: Choose projects that are within your skill level and gradually work your way up to more complex designs.
  • Take your time: Don't rush the process. Allow yourself enough time to complete each step carefully and avoid mistakes.
  • Have fun: Wood crafts are a fun and rewarding hobby. Enjoy the process and embrace your creativity.
  • Get creative: There are endless possibilities when it comes to decorating your wood crafts. Don't be afraid to experiment with different colors, patterns, and embellishments.
  • Upcycle and repurpose: Look for opportunities to reuse materials from other projects or find unique pieces at thrift stores or garage sales.
  • Share your creations: Share your creations with friends and family and spread the joy of DIY Christmas decorating.

With a little creativity and some simple tools, you can create beautiful and budget-friendly wood crafts that will add a special touch to your Christmas decor. Remember to prioritize safety, have fun, and embrace your inner woodworker. Happy crafting!

DIY Modern Coffee Tables for a High-End Look at an Affordable Price

DIY Modern Coffee Tables for a High-End Look at an Affordable Price

DIY Modern Coffee Tables for a High-End Look at an Affordable Price

Let's face it, a stylish coffee table can really make or break your living room. But those sleek, modern designs at the furniture stores can leave a big hole in your wallet. Not to worry! With a little DIY know-how, you can create a stunning coffee table that's both modern and budget-friendly. Get ready to unleash your inner designer and impress your guests with your creativity!

The Magic of Mixing Materials

One of the best ways to achieve that high-end look on a budget is by mixing and matching materials. It adds depth and dimension to your design, and it's a lot more interesting than just a plain wood table. Think about combining:

  • Wood and Metal: This classic combo creates a timeless and sophisticated feel. You can use reclaimed wood for the tabletop and steel for the legs, or vice versa. Bonus points for adding some industrial-chic flair.
  • Concrete and Wood: This pairing offers a rough-and-refined aesthetic. Concrete is super trendy right now and it adds a cool, urban vibe.
  • Marble and Brass: This luxurious combination is perfect for a glam and elegant space. You can even use faux marble for the tabletop, which is more affordable.

The possibilities are endless! Don't be afraid to get creative and experiment with different textures and colors to create a unique look that reflects your personal style.

DIY Coffee Table Ideas to Inspire You

Ready to start brainstorming? Here are some DIY coffee table ideas that are sure to get your creative juices flowing:

Pallet Coffee Table

Repurpose old pallets into a modern coffee table. Sand them down, paint them in a bold color, or even leave them raw for a rustic look. You can use metal hairpin legs to add a touch of industrial chic. Easy peasy, and you're giving new life to an old material. Bonus points for eco-friendliness!

Concrete Top with Hairpin Legs

This combo is super trendy and surprisingly easy to make. You can buy pre-made concrete slabs or DIY your own. Attach some stylish hairpin legs, and voila! Instant modern coffee table. Be sure to seal the concrete for protection and durability.

Upcycled Drawer Coffee Table

Have some old drawers lying around? Give them a new purpose as a unique coffee table. You can paint them, stain them, or even wallpaper them for a unique look. Use metal legs or wood blocks for support. This is a great way to add character to your living room.

Industrial Pipe Coffee Table

If you love the industrial style, this is the perfect DIY project for you. Use metal pipes to build the frame, and a reclaimed wood plank for the top. You can leave the pipes raw or paint them in a metallic color. The industrial vibe will add a touch of urban coolness to your space.

Pro Tips for a Professional Finish

Now that you have your design in mind, here are some tips to help you achieve a polished look:

  • Sand, Sand, Sand!: Even if you're using reclaimed wood, sand it down to smooth out any rough spots and create a uniform surface. This will make your table look much more polished.
  • Choose the Right Paint or Stain: If you're using wood, consider staining it for a natural look or painting it in a bold color. For metal, you can use spray paint or brush-on paint.
  • Invest in Quality Hardware: Don't skimp on the legs or the hardware that holds your table together. High-quality hardware will make your table look and feel more durable.
  • Don't Forget the Finishing Touches: Seal your tabletop with a clear coat to protect it from spills and scratches. You can also add some decorative elements like a glass top or a custom-made tray to complete the look.

Commonly Asked Questions

How much does it cost to build a DIY coffee table?

The cost of a DIY coffee table can vary widely depending on the materials you use. Repurposed materials like pallets or old drawers can be very affordable, while using high-end materials like marble or concrete can be more expensive. You can find affordable options at hardware stores, antique shops, or even online marketplaces. Do some research to find the best deals.

What tools do I need to build a DIY coffee table?

The tools you'll need will depend on the specific project you choose. But generally, you'll need basic woodworking tools like a saw, drill, screwdriver, and sander. You might also need a level, measuring tape, and clamps. If you're working with metal, you'll need a metal cutter and a welder.

Do I need any special skills to build a DIY coffee table?

No special skills are required! Many DIY coffee table projects are relatively simple and can be completed with basic woodworking knowledge. If you're a beginner, there are many online tutorials and resources that can guide you through the process. Just remember to start with a simple project and gradually increase the complexity as you gain more experience.

Building your own coffee table is a fun and rewarding project that can save you a lot of money. Don't be afraid to get creative and experiment with different materials and designs. With a little effort and some DIY know-how, you can create a unique and stylish piece that will be the envy of your friends.

Monday, November 18, 2024

How to Market and Sell Tiered Plant Stands Successfully

How to Market and Sell Tiered Plant Stands Successfully

Unleash Your Inner Plant Parent: Marketing and Selling Tiered Plant Stands

The rise of houseplants has transformed homes into verdant oases, and tiered plant stands are the perfect solution for displaying these leafy companions. If you're a maker or retailer looking to tap into this booming market, understanding how to market and sell tiered plant stands effectively is key. This guide will equip you with the tools and strategies to cultivate success.

Craft a Compelling Brand Identity

Before diving into marketing, establish a strong brand identity that resonates with your target audience. Define your brand's aesthetic, voice, and values. Are you aiming for a rustic farmhouse feel, a minimalist modern style, or something completely unique? Consistent branding builds trust and recognition, creating a strong foundation for your marketing efforts.

Tell Your Story

Every brand has a story. Share yours! Highlight your inspiration, passion, and craftsmanship. Tell your customers why you create tiered plant stands, what makes them special, and how they enhance the lives of your customers. Personalizing your brand connects with potential buyers on a deeper level, forging lasting relationships.

Showcase Your Style

Visuals are paramount in the world of plant stands. High-quality, professional photographs and videos showcasing your product's beauty and functionality are essential. Use natural lighting and diverse backgrounds to depict how your stands would fit into various home decor styles. Don't shy away from highlighting the versatility of your product by showing it styled with different plants and accessories.

Master the Art of Online Marketing

The digital age provides a vast playground for reaching plant lovers worldwide. Leverage various online platforms to promote your tiered plant stands, building brand awareness and driving sales.

Craft a Captivating Website

Your website is your online storefront. Ensure it's visually appealing, user-friendly, and showcases your products clearly. High-resolution images, detailed product descriptions, and consistent branding are crucial. Feature customer testimonials and highlight your unique selling propositions to build trust and encourage purchases.

Embrace Social Media

Social media platforms like Instagram, Facebook, and Pinterest are ideal for showcasing your plant stands in their element. Create captivating content that inspires and educates your audience. Share styling tips, plant care advice, and behind-the-scenes glimpses into your crafting process. Engage with your followers, respond to comments, and run contests to foster community and build relationships.

Harness the Power of Email Marketing

Build an email list to nurture relationships with potential customers. Offer valuable content like plant care guides, styling tips, and exclusive discounts. Segment your list based on interests to tailor your emails for maximum impact. Remember, email marketing provides a direct line of communication with your audience, allowing you to showcase new products, announce promotions, and build lasting connections.

Expand Your Reach Beyond the Digital Realm

While online marketing is powerful, don't overlook the benefits of traditional marketing and offline events. These channels offer unique opportunities to connect with your target audience on a personal level.

Participate in Local Markets and Craft Fairs

Connecting directly with customers at markets and fairs provides valuable insights and opportunities to showcase your plant stands. Offer hands-on experiences, like plant styling demonstrations, and engage in conversations about your products. The personal touch can make all the difference in creating lasting impressions.

Collaborate with Influencers

Influencer marketing is a powerful strategy for reaching a wider audience. Partner with plant enthusiasts, interior designers, and lifestyle bloggers who align with your brand's aesthetic. Offer them exclusive product samples or discounts in exchange for authentic reviews and social media promotions. This can expose your plant stands to a highly engaged and relevant audience.

Boost Sales with Effective Strategies

Once you've captured the attention of potential customers, it's time to convert them into buyers. Effective sales strategies are crucial for maximizing your success.

Offer Competitive Pricing

Research your competitors and determine a pricing strategy that's both attractive to customers and profitable for your business. Consider offering tiered pricing based on stand size, material, or customization options. Don't be afraid to highlight value by showcasing the durability, functionality, and aesthetic appeal of your plant stands compared to lower-priced alternatives.

Provide Excellent Customer Service

Exceptional customer service is key to building loyalty and encouraging repeat business. Respond promptly to inquiries, address concerns with empathy, and go the extra mile to ensure customer satisfaction. Offer clear and concise return policies, packaging your products carefully to avoid damage, and ensure a smooth and enjoyable purchasing experience.

Encourage Reviews and Testimonials

Positive reviews and testimonials from satisfied customers are powerful marketing tools. Ask your customers to leave reviews on your website and social media platforms. Highlight positive feedback in your marketing materials to build trust and encourage new purchases.

Conclusion

Marketing and selling tiered plant stands requires a thoughtful approach, combining online and offline strategies to reach your target audience. By crafting a compelling brand identity, leveraging digital marketing channels, and embracing traditional marketing methods, you can create a successful business that nourishes both your passion and your bottom line. Remember, the key is to build strong relationships with your customers, offer high-quality products, and provide exceptional service. With dedication and a touch of green inspiration, you can cultivate a thriving business in the ever-growing world of houseplants.

Wednesday, November 13, 2024

Profitable Serving Tray Projects for Beginners to Build

Profitable Serving Tray Projects for Beginners to Build

Profitable Serving Tray Projects for Beginners to Build

Looking to build a profitable side hustle? You've come to the right place. Serving trays are a great woodworking project for beginners that can be easily customized and sold for a healthy profit. Not only are they functional and stylish, but they also make excellent gifts for any occasion. Here's what you need to know about building and selling your own serving trays.

Choosing the Right Wood

Start by selecting the right wood for your serving trays. Pine and plywood are affordable and easy to work with, while hardwoods like maple and walnut offer a more luxurious feel. Consider the style and design you're aiming for and the price point you're targeting.

Pine and Plywood: The Budget-Friendly Options

Pine and plywood are great choices for beginners due to their affordability and ease of workability. Pine has a soft texture that makes it easy to cut and sand, while plywood provides a smooth, stable surface. These materials are perfect for creating simple and functional serving trays that won't break the bank.

Hardwoods: A Touch of Elegance

If you're aiming for a premium product, consider hardwoods like maple and walnut. They offer beautiful grain patterns, durability, and a touch of elegance. While more expensive than pine and plywood, hardwoods allow you to charge a higher price and attract discerning customers who appreciate high-quality craftsmanship.

Designing Your Serving Tray

Before you start cutting wood, take the time to sketch out your serving tray designs. This will help you visualize the final product and ensure all the elements fit together perfectly. Consider the following factors:

  • Size and Shape: Choose a size that's both functional and appealing. Rectangular, square, and oval shapes are classic choices, while more unique shapes can add a touch of personality.
  • Handles: Handles are essential for easy carrying. You can incorporate built-in handles, add decorative handles, or simply create a lip around the edge for a comfortable grip.
  • Finish: A natural finish highlights the wood's grain, while stains and paints offer endless possibilities for customization.
  • Details: Add decorative elements like inlays, carvings, or laser-etched designs to create truly unique serving trays.

Crafting Your Serving Trays

Once you have your design in hand, it's time to bring it to life! Use precise measurements and accurate cuts for professional results. Depending on your design, you'll need a variety of woodworking tools like:

  • Circular saw or table saw: For making precise cuts
  • Sandpaper: For smoothing out rough edges and creating a polished finish
  • Router: For creating decorative edges and shaping handles
  • Clamps: For securely holding pieces together while gluing
  • Wood glue: For assembling the tray
  • Finishing supplies: Stain, paint, varnish, or sealant, depending on your desired look

Marketing and Selling Your Serving Trays

With your beautiful serving trays complete, it's time to market them and start earning! There are numerous avenues for selling your handmade products:

  • Online Marketplaces: Etsy, Amazon Handmade, and Facebook Marketplace are excellent platforms to reach a wide audience of potential buyers.
  • Craft Fairs and Farmers Markets: In-person events allow you to connect directly with customers and showcase your unique designs.
  • Social Media: Instagram and Pinterest are fantastic for showcasing your work and building an online following.
  • Local Shops and Galleries: Reach out to local shops and galleries that might be interested in carrying your handcrafted serving trays.

With a little creativity, dedication, and marketing savvy, building and selling serving trays can be a rewarding and profitable venture. Start with a simple design, experiment with different woods and finishes, and embrace the joy of creating something beautiful and functional that others will cherish.

Wood Floating Shelves for Plant Lovers: Display Tips

Wood Floating Shelves for Plant Lovers: Display Tips

Wood Floating Shelves for Plant Lovers: Display Tips

Hey there, plant parents! Are you looking for a stylish and space-saving way to showcase your leafy companions? Look no further than wood floating shelves! These beauties are not only functional but also add a touch of warmth and natural charm to any room. Let's dive into the world of wood floating shelves and explore some tips to create the perfect plant display.

Choosing the Right Shelves

The first step is to choose the right shelves for your plants. Consider these factors:

Size and Shape

Think about the size and shape of your plants. For smaller succulents or cacti, you can opt for narrow shelves. Larger plants, like monsteras or ferns, require wider shelves to accommodate their growth.

Material

While wood is a popular choice for floating shelves, you can also find them in other materials like metal or bamboo. Choose a material that complements your existing decor and the style of your plants.

Finish

Consider the finish of the shelves. Natural wood finishes add a rustic charm, while painted or stained shelves can create a more modern look. Choose a finish that complements your plants and your overall decor.

Number of Shelves

Determine the number of shelves you need based on your plant collection. If you have a lot of plants, multiple shelves can create a lush and layered display. For a smaller collection, one or two shelves may be sufficient.

Planning Your Plant Display

Now that you've chosen your shelves, it's time to plan your plant display. Here are some tips:

Consider the Light

Plants need light to thrive. Before placing your shelves, think about the amount of natural light in your room. Place light-loving plants on shelves that receive direct sunlight, and shade-tolerant plants on shelves that are in indirect light. Be mindful of plant placement to prevent scorching or stunting.

Group Plants by Size and Shape

Create visual interest by grouping plants of similar sizes and shapes together. You can also mix and match different types of plants to create a unique and balanced display. Play with different textures and foliage colors to add depth and dimension.

Mix and Match Heights

To add visual appeal, use shelves of different heights and create a staggered effect. Mix in a couple of hanging plants to add height and drama. This helps to create a layered look and prevents your display from feeling flat.

Think About Color

Think about the colors of your plants and the overall aesthetic you want to achieve. For example, you can create a monochromatic display by using plants with similar colors, or a vibrant display with plants of contrasting colors. You can also incorporate other decorative elements, like colorful pots or planters, to complement the plant colors.

Styling Your Shelves

Now it's time to style your shelves and bring your plant display to life! Here are some ideas:

Pot Choice

Choose pots and planters that complement the style of your shelves and your overall decor. You can opt for neutral colors like white, black, or gray, or add a pop of color with bright pots. Look for pots with interesting textures or patterns to add visual interest.

Decorative Elements

Don't be afraid to add some decorative elements to your shelves, like small sculptures, candles, or books. These can add a personal touch to your display and complement the plant colors. Avoid adding too many items that compete with the plants, or make the space feel too cluttered.

Layer Your Plants

Don't be afraid to layer your plants on the shelves. You can use smaller plants in front of larger plants, or use different heights of plants to create visual interest. Consider adding trailing plants, like pothos or spider plants, to hang down from the shelves.

Tips for Plant Care

Now that you have a beautiful plant display, it's important to keep your plants happy and healthy. Here are some tips:

  • Water Regularly: Water your plants according to their needs. Some plants require more water than others, so it's important to research the specific care requirements of each plant. Overwatering can be detrimental to plant health, so let the top inch of soil dry out between waterings.
  • Fertilize Regularly: Plants need nutrients to thrive. Fertilize your plants according to their needs, but avoid overfertilizing, which can burn the roots. Look for organic fertilizers that are gentle on plants and the environment.
  • Monitor for Pests: Be on the lookout for pests, such as aphids, spider mites, or mealybugs. These can quickly multiply and damage your plants. Take preventative measures to protect your plant collection by keeping your plants clean and free of debris, and use natural pest control methods if necessary.
  • Rotate Your Plants: Rotate your plants regularly to ensure that all sides of the plant receive adequate light. This will help to prevent them from becoming leggy or lopsided.
  • Enjoy Your Plant Paradise

    With a little planning and creativity, you can create a beautiful and thriving plant display on wood floating shelves. Don't be afraid to experiment and have fun with it! Remember to enjoy the process and the satisfaction of bringing life and beauty into your space.

    Wood Gifts with a Personal Touch for Any Celebration

    Wood Gifts with a Personal Touch for Any Celebration

    Wood Gifts with a Personal Touch for Any Celebration

    In a world saturated with mass-produced items, finding a gift that truly stands out and speaks to the heart is a treasure. Wood gifts, with their natural beauty, timeless appeal, and potential for personalization, offer a unique and heartfelt way to celebrate any occasion. From birthdays and weddings to holidays and anniversaries, a well-crafted wooden gift can leave a lasting impression and become a cherished heirloom for years to come.

    Why Choose Wooden Gifts?

    Wood is a material that evokes warmth, tradition, and a connection to nature. It's a sustainable and renewable resource, making it an eco-conscious choice. Unlike plastic or metal, wood doesn't lose its charm over time; in fact, it often becomes more beautiful with age, developing a rich patina and telling stories of its own. The inherent versatility of wood allows for a wide range of designs, making it perfect for personalized gifts.

    Personalized Wood Gifts for Every Occasion

    The possibilities for personalized wood gifts are endless, limited only by your imagination. Here are some ideas to inspire you:

    Birthdays and Anniversaries

    • Engraved Wooden Boxes: A classic choice for storing keepsakes, jewelry, or sentimental items. Personalize the box with the recipient's name, a special date, or a heartfelt message.
    • Personalized Wooden Coasters: A practical and stylish gift, wooden coasters can be engraved with a monogram, a funny quote, or even a family crest.
    • Custom-Made Wooden Cutting Boards: For the home chef, a cutting board made of beautiful hardwood is a thoughtful and functional gift. Add a personalized touch with an engraved name, initials, or a special message.

    Weddings

    • Wooden Wedding Signs: Create a unique and rustic feel with a custom-made wooden sign for the wedding ceremony or reception. Personalize it with the couple's names, wedding date, or a special quote.
    • Engraved Wooden Wine Box: A beautiful way to present a bottle of wine or champagne to the newlyweds. Personalize the box with their names, wedding date, and a special message.
    • Wooden Photo Frames: Preserve those precious wedding memories in a handcrafted wooden frame. Choose from a variety of styles and personalize it with the couple's names or wedding date.

    Holidays and Special Occasions

    • Christmas Ornaments: Make this holiday season extra special with personalized wooden ornaments featuring names, dates, or festive designs.
    • Wooden Picture Frames: A thoughtful gift for any occasion, wooden photo frames can be personalized with a special message, a date, or a name.
    • Wooden Pencils or Pens: An eco-friendly and elegant gift for writers, artists, or anyone who enjoys putting pen to paper. Personalize with a name or a special message.

    Finding the Perfect Wood Gift

    With the wide array of options available, finding the perfect wood gift is easier than you might think. There are many online retailers specializing in handcrafted wooden gifts, offering a diverse selection of styles and customization options. Local craft fairs and artisan markets are also excellent places to discover unique and personalized wood gifts.

    When choosing a wood gift, consider the recipient's taste and interests. A rustic wood gift might be perfect for a nature lover, while a sleek and modern piece would be ideal for someone with contemporary tastes. The key is to choose a gift that reflects the recipient's personality and will be cherished for years to come.

    Wood gifts are not just presents; they are expressions of love, appreciation, and thoughtfulness. They are a tangible way to show someone you care and to create a lasting memory that will be treasured for generations to come.

    Tuesday, November 12, 2024

    DIY Compost Bin Projects with Step-by-Step PDF Plans

    DIY Compost Bin Projects with Step-by-Step PDF Plans

    DIY Compost Bin Projects with Step-by-Step PDF Plans

    Composting is a fantastic way to divert organic waste from landfills and create a nutrient-rich soil amendment for your garden. Building your own compost bin not only saves money but also allows you to customize the design to suit your specific needs and style. In this comprehensive guide, we'll explore several DIY compost bin projects, providing detailed step-by-step PDF plans for you to follow.

    Benefits of Composting

    Before we delve into the projects, let's understand why composting is so beneficial:

    • Reduces Waste: Compost bins divert food scraps, yard waste, and other organic materials from landfills, reducing waste and its environmental impact.
    • Enriches Soil: Compost adds essential nutrients, improves soil structure, and increases water retention, resulting in healthier, more productive gardens.
    • Promotes Sustainability: Composting is a sustainable practice that minimizes our reliance on synthetic fertilizers, reducing pollution and conserving resources.
    • Saves Money: Homemade compost eliminates the need to purchase expensive commercial fertilizers, saving you money in the long run.

    Compost Bin Types and Their Features

    There are various compost bin types available, each with its own pros and cons:

    1. Three-Bin Compost System

    This system consists of three bins, allowing for a continuous composting process. The first bin holds fresh materials, the second bin houses actively decomposing compost, and the third bin contains finished compost ready for use.

    2. Tumbler Compost Bin

    These bins are typically cylindrical and rotate on an axle. The tumbling action promotes aeration and even decomposition, leading to faster composting.

    3. Barrel Compost Bin

    A simple and affordable option, barrel compost bins utilize readily available 55-gallon drums. You can create a single-bin system or a multi-bin setup for staged composting.

    4. Pallet Compost Bin

    Using recycled pallets, you can build a sturdy and attractive compost bin. These bins can be customized with different layouts and sizes.

    5. Worm Composting Bin

    Also known as vermicomposting, this method involves using worms to break down organic waste. Worm composting bins are typically smaller and designed for indoor use.

    Choosing the Right Compost Bin for You

    The best compost bin for you depends on your individual needs and preferences. Consider the following factors:

    • Space Availability: Measure your yard or indoor space to determine the suitable size and type of compost bin.
    • Composting Volume: Estimate how much organic waste you produce to choose a bin with sufficient capacity.
    • Aesthetics: If you want a visually appealing compost bin, consider pallet or other decorative options.
    • Accessibility: Choose a bin that is easily accessible for adding materials and removing compost.
    • Climate: In cold climates, a bin with insulation or a tumbling option might be better suited.

    DIY Compost Bin Projects with Step-by-Step PDF Plans

    Now, let's dive into specific DIY compost bin projects with detailed PDF plans:

    1. Three-Bin Compost System (PDF Plan)

    This project involves building a three-bin compost system from readily available materials like wood planks, screws, and hinges. The PDF plan will guide you through the following steps:

    1. Cutting and Assembling the Frames: The plan provides precise measurements for cutting the wood planks to construct the frames for each bin.
    2. Adding Sides and Bottoms: Instructions detail how to attach the sides and bottoms to the frames, creating the three individual bins.
    3. Connecting the Bins: Learn how to hinge the bins together to facilitate the composting process.
    4. Adding Ventilation and Drainage: The plan includes details on incorporating ventilation holes for airflow and drainage holes to prevent waterlogging.
    5. Finishing Touches: The PDF plan will guide you on adding finishing touches like painting or staining the bin for a more aesthetic look.

    2. Pallet Compost Bin (PDF Plan)

    This project utilizes recycled pallets to create a sturdy and attractive compost bin. The PDF plan will cover the following steps:

    1. Choosing and Preparing the Pallets: The plan provides tips on selecting suitable pallets and preparing them for use.
    2. Assembling the Bin: Instructions detail how to arrange and secure the pallets to create the bin structure.
    3. Adding Sides and a Door: Learn how to attach sides and a door to the pallet framework for a finished bin.
    4. Adding Ventilation: The plan includes details on creating ventilation holes for optimal composting.
    5. Finishing Touches: The PDF plan will guide you on adding finishing touches like painting or staining the bin for a desired look.

    3. Barrel Compost Bin (PDF Plan)

    This project uses a readily available 55-gallon drum to build a simple and affordable compost bin. The PDF plan will walk you through the following steps:

    1. Preparing the Barrel: The plan provides tips on cleaning and preparing the barrel for use.
    2. Adding Ventilation Holes: Learn how to drill ventilation holes for airflow and proper decomposition.
    3. Creating a Door: Instructions detail how to cut and install a door for easy access.
    4. Securing the Door: The plan includes details on adding hinges and a latch to secure the door.
    5. Finishing Touches: The PDF plan will guide you on adding finishing touches like painting or decorating the barrel for a unique look.

    Composting Tips and Techniques

    Once you have built your compost bin, follow these tips to ensure successful composting:

    • Brown to Green Ratio: Maintain a balanced ratio of brown materials (carbon-rich) like leaves and twigs, and green materials (nitrogen-rich) like kitchen scraps and grass clippings. A good ratio is 2:1 brown to green.
    • Moisture and Aeration: Keep the compost moist but not soggy. Turn the compost regularly to ensure adequate aeration.
    • Avoid Certain Materials: Avoid adding meat, bones, dairy, or oily food scraps to your compost bin.
    • Patience: Composting takes time. It may take several weeks or months for your compost to fully decompose.
    • Monitor and Adjust: Regularly monitor the compost temperature and moisture levels, and adjust your composting practices as needed.

    Conclusion

    Building your own compost bin is a rewarding project that offers numerous environmental and economic benefits. By following the step-by-step PDF plans provided in this guide, you can create a custom-designed compost bin that suits your needs and style. Remember to use sustainable materials and practice proper composting techniques to maximize the benefits of this eco-friendly practice.

    Squirrel Box DIY: Plans for Every Backyard

    Squirrel Box DIY: Plans for Every Backyard

    Squirrel Box DIY: Plans for Every Backyard

    Are you tired of squirrels raiding your bird feeders? Tired of watching them steal your hard-earned birdseed? Then it's time to build your own squirrel box. Not only will it keep those pesky squirrels away, but it will also provide a safe and comfortable haven for them. And what could be better than a happy squirrel? A happy bird! And the best part? You can do it yourself, and it's actually pretty easy. Let's dive in!

    Why Build a Squirrel Box?

    While you may think you're building a squirrel box to keep them away from your bird feeders, there's more to it than just that. By providing a place for squirrels to live, you can help to reduce their impact on your yard. Squirrels often damage trees and gardens when they're looking for food. By providing them with a place to live, you can help to reduce the amount of damage they cause.

    Not only that, but it also gives you a chance to get up close and personal with these fascinating creatures. You can observe their behavior and learn more about their lives. What do they eat? Where do they sleep? How do they raise their young? Building a squirrel box will be an amazing educational experience for you and your family.

    Choosing a Location

    Where you decide to place your squirrel box will make a huge difference. You want to choose a location that is safe, secure, and comfortable for the squirrel. Here are some things to think about:

    Safety and Security

    • Place the squirrel box at least 10 feet off the ground. This will help to keep the squirrels safe from predators and make it more difficult for them to be disturbed.
    • Attach the squirrel box to a tree trunk or sturdy pole. Make sure that it is securely attached so that the squirrels won't be able to knock it down.
    • You'll want to place it in a location where it gets adequate sunlight and shade. You don't want the squirrel box to get too hot or too cold. Squirrels will appreciate a location that's out of the direct elements.
    • You can use a bird feeder as a guide. If you're trying to keep squirrels away from your bird feeder, place the squirrel box close by, but not right next to it. Squirrels will be drawn to the squirrel box before they get a chance to get to the bird feeder.

    Comfort

    You want to make sure your squirrel box is as comfortable as possible for the squirrel. Here are a few tips:

    • Face the entrance of the squirrel box away from the prevailing winds to keep the squirrel cozy.
    • Place the squirrel box in a location that is not too noisy. Squirrels are sensitive to noise and they may be disturbed by traffic, lawnmowers, or other loud noises. They'll appreciate a bit of peace and quiet!

    Materials

    You'll need a few basic materials to build your squirrel box. You can find them at most hardware stores. Here's a list:

    • Wood: You can use any type of wood that you want to build your squirrel box, but cedar or redwood are good choices because they are naturally resistant to rot and insects.
    • Screws: You'll need screws to attach the pieces of wood together. Make sure you use screws that are long enough to go all the way through the wood and into the tree or pole.
    • Saw: You'll need a saw to cut the wood to size. A handsaw, circular saw, or jigsaw will work.
    • Drill: You'll need a drill to pre-drill holes for the screws. This will help to prevent the wood from splitting when you screw it together. A drill also helps to make the entire process easier and less tiring.
    • Measuring tape: You'll need a measuring tape to measure the wood and make sure that all of the pieces are the right size. A tape measure is always a handy tool to have in your DIY arsenal.
    • Pencil: You'll need a pencil to mark the wood where you need to cut it and drill holes. A pencil will also help you make your project as precise as possible.

    Instructions

    Now that you have all of your materials, it's time to start building your squirrel box. Here are the steps:

    Step 1: Cut the Wood

    First, you'll need to cut the wood to size. If you are using a pre-made squirrel box kit, you can skip this step. You'll need to cut the wood to the following dimensions:

    • Bottom: 12 inches wide by 12 inches long
    • Sides: 12 inches high by 12 inches wide
    • Front: 12 inches high by 12 inches wide
    • Back: 12 inches high by 12 inches wide
    • Roof: 12 inches wide by 12 inches long

    Step 2: Assemble the Box

    Now that you've cut the wood, it's time to put your squirrel box together. Use the screws to attach the bottom, sides, front, and back of the box together.

    Step 3: Attach the Roof

    Next, you'll need to attach the roof to the box. You can do this by using a hinge or by simply nailing it on. You'll want to make sure that the roof is secured to the box so that it won't fall off when the squirrel is inside. If you are using a hinge, be sure that it opens to allow the squirrel to get inside. If you are using a hinge, make sure to place it on the back of the box, as this will make it difficult for predators to access the inside. A squirrel box that is easy to get into is a safe squirrel box!

    Step 4: Install the Entrance

    You'll need to cut a 3-inch by 3-inch hole in the front of the squirrel box. This will be the squirrel's entrance. You can make the hole bigger or smaller, depending on the size of the squirrels in your area.

    Step 5: Add Finishing Touches

    Once you've finished building the squirrel box, you can add some finishing touches. For example, you can paint the box to match your home's decor. You can also add some small branches or twigs to the inside of the box to give the squirrel something to climb on. To deter insects and make the box last longer, you can stain the box with a wood sealant. This will help to keep the wood from rotting and will also help to make the box more attractive to squirrels.

    Tips for Success

    Here are a few tips for building a squirrel box that squirrels will love:

    • Use high-quality wood: Using wood that is resistant to rot and insects will help to ensure that your squirrel box lasts for many years. Use cedar, redwood, or even treated lumber to keep your squirrel box in good shape.
    • Make sure the entrance is the right size: The entrance should be big enough for the squirrels to get in and out easily but not so big that predators can get in. Squirrels typically can fit through an opening that is about 3-inches wide and 3-inches tall. You can experiment with different entrance hole sizes depending on the squirrels in your area. The squirrels will let you know if they like the size of the entrance. You can also make the entrance hole taller and narrower if you are concerned about larger predators.
    • Don't forget to add bedding: Provide the squirrels with a soft place to nest. You can use shredded paper, straw, or even pine needles as bedding.

    Conclusion

    Building a squirrel box is a fun and rewarding project. It's a great way to help the squirrels in your area and to learn more about these fascinating creatures. So, grab your tools and get started on your squirrel box today. You'll be glad you did!

    How to build a wooden desk with adjustable height

    How to build a wooden desk with adjustable height

    Building a Wooden Desk with Adjustable Height: A DIY Guide

    Hey there, woodworking enthusiasts and desk-seekers! Ready to take on a project that will not only make your workspace more comfortable but also give you a real sense of accomplishment? Building a wooden desk with adjustable height is a fantastic project that’s definitely within your reach. It’s a bit more involved than just slapping together a few boards, but I promise, it’s totally doable. Let's dive in and get you set up for success!

    Planning Your Perfect Desk

    Before you start swinging that hammer, it's crucial to spend some time planning. This will help you avoid frustrating mistakes and ensure you end up with a desk that meets your needs perfectly. Here’s what you should think about:

    1. Dimensions and Design

    * **How much space do you have?** Measure the spot where you want to put your desk. You'll need to consider not only the desk's footprint but also how much room you need for your chair to move around comfortably. * **What kind of desk shape are you going for?** Do you want a classic rectangular desk, a sleek L-shaped desk, or something more unique? * **What will you be using your desk for?** If you need a lot of workspace, maybe a wider desk is a better choice. If you'll be using it mostly for writing, a smaller desk might be ideal. * **How high do you want it to go?** Think about what height feels most comfortable for both standing and sitting. You can even get a measuring tape and experiment with different heights!

    2. Choosing Your Wood

    * **Think about your budget.** Hardwoods like maple, cherry, or walnut are beautiful and durable but can be more expensive. Softer woods like pine or plywood are affordable and easier to work with. * **Consider the aesthetic.** Do you want a sleek, modern desk? A rustic farmhouse style? Or something in between? The wood you choose will greatly influence the final look. * **Think about the thickness.** You'll need a sturdy top that can support your electronics and all your stuff. Generally, 3/4 inch thickness is a good starting point for a desk top.

    3. The Adjustable Mechanism

    * **The most common approach:** Use a set of gas struts or springs. These are readily available at most hardware stores and are relatively easy to install. * **Consider your height range.** How much adjustment do you need? The struts are available in various weight capacities and travel lengths, so choose the ones that will suit your needs and the weight of your desk. * **Think about the overall design.** The struts can be integrated into the legs of the desk or attached to the underside of the tabletop.

    Gather Your Tools and Materials

    Now that you've got a solid plan, it's time to gather your tools and materials.

    Tools

    * **Saw (Circular, jigsaw, or table saw):** For cutting your wood to size. * **Drill:** For making holes for screws, dowels, and other fasteners. * **Screwdriver:** For attaching your pieces together. * **Measuring tape:** For accurate measurements. * **Level:** For ensuring that your desk is level. * **Clamps:** For holding pieces together while you glue or screw them. * **Safety glasses:** For protecting your eyes. * **Dust mask:** For protecting your lungs from sawdust. * **Sandpaper:** For smoothing out your wood and giving it a nice finish. * **Wood glue:** For joining your pieces together. * **Wood filler:** For filling in any gaps or imperfections.

    Materials

    * **Wood:** The type and amount will depend on your design and size. * **Gas struts or springs:** Choose the correct size and weight capacity. * **Hardware:** This will include screws, dowels, nuts, bolts, and any other fasteners you need for your specific design. * **Finish:** You can use a stain, paint, varnish, or oil to protect and enhance the appearance of your desk.

    Building the Desk Frame

    Okay, let's start assembling the desk frame.

    1. Cut the Wood

    * Use your saw to cut the wood according to your plan. * Make sure your cuts are accurate and square. If you're using plywood, pay attention to the grain direction. * Sand the cut edges to remove any rough spots.

    2. Assemble the Leg Framework

    * **For a classic rectangular design:** You can use two pairs of legs connected by rails. * **For a more sturdy desk:** Consider adding cross supports or stretchers between the legs. * **Use your drill and screws (or dowels and glue) to attach the pieces together.** * **Make sure all corners are square and the frame is level.**

    3. Install the Gas Struts or Springs

    * **Follow the manufacturer's instructions carefully.** You'll typically need to attach brackets to the legs and the underside of the tabletop. * **Adjust the struts or springs to your desired height range.** * **Test the mechanism to ensure smooth operation.** You want it to move up and down effortlessly.

    Creating the Desk Top

    Now we're moving on to the top, the star of the show.

    1. Build the Desk Top Panel(s)

    * **For a simple, single-panel top:** Cut the wood to the desired size and shape. * **For a larger, more complex top:** You might need to join multiple pieces together using butt joints, dado joints, or mortise and tenon joints. * **Use glue and clamps to secure the pieces together.** * **Once the glue is dry, sand the entire surface to create a smooth and even top.**

    2. Attach the Top to the Frame

    * **If you are using gas struts or springs:** The top will typically be attached to the struts' brackets. * **If you're using a different mechanism:** You might need to drill holes through the legs and the tabletop and secure them with bolts. * **Make sure the top is centered and level on the frame.**

    Finishing Touches

    Almost there! Now it’s time to add the finishing touches that make your desk stand out.

    1. Sand and Fill

    * **Sand the entire desk surface with progressively finer grits of sandpaper.** This will give your desk a smooth, even finish. * **Fill any gaps, holes, or imperfections with wood filler.** Let it dry completely and then sand it flush with the surrounding wood.

    2. Apply a Finish

    * **Choose a finish that complements the wood you’ve used and your overall aesthetic.** * **Apply the finish according to the manufacturer's instructions.** * **Let the finish dry completely before using your desk.**

    Enjoying Your New Desk

    Congratulations! You've just built a stunning, adjustable-height desk that's unique and perfectly tailored to your needs.

    Tips for Success

    * **Don't rush the process.** Take your time and follow the instructions carefully. * **Use a good quality wood and hardware.** This will ensure a sturdy, long-lasting desk. * **Ask for help if you need it.** Don't be afraid to reach out to a friend, family member, or an experienced woodworker for assistance.

    Final Thoughts

    Building your own desk is a fun and rewarding experience. It gives you the satisfaction of creating something practical and beautiful, and it allows you to personalize your workspace in a way that's impossible with a store-bought desk. So, get out there and start crafting! You've got this!

    Easy DIY Squirrel Box Plans to Get You Started

    Easy DIY Squirrel Box Plans to Get You Started

    Easy DIY Squirrel Box Plans to Get You Started

    Bringing nature closer to your home is a wonderful way to add life and vibrancy to your surroundings. One fantastic way to do this is by building a squirrel box. These charming structures offer a safe haven for these playful creatures, allowing you to observe their daily antics up close. Building your own squirrel box is a surprisingly simple project, perfect for beginners and experienced DIY enthusiasts alike. With just a few basic tools and materials, you can create a cozy and welcoming home for these furry friends. Let’s dive into the world of DIY squirrel box construction, starting with gathering the necessary materials.

    Materials Needed

    Before embarking on your squirrel box building adventure, ensure you have all the essential materials readily available. This will streamline your process and prevent any frustrating delays. Here’s a comprehensive list of everything you’ll need:

    • Wood: Choose durable, weather-resistant wood like cedar or redwood. A 1x6 or 1x8 board will suffice for the sides, and a 1x12 board is perfect for the base and roof. Remember to select boards that are free of knots and imperfections for structural integrity.
    • Screws: Use 1-1/2” or 2” wood screws for securing the different parts of the box. It’s advisable to use galvanized screws for enhanced rust resistance.
    • Saw: A handsaw or circular saw will be your best friend for cutting the wood to the desired dimensions. A jigsaw can also be helpful for creating intricate shapes.
    • Drill: A drill with a screwdriver bit is essential for fastening the screws, ensuring a secure build.
    • Tape measure: Accurate measurements are crucial for achieving a well-proportioned squirrel box. Ensure your tape measure is in good working order.
    • Pencil: Use a pencil to mark the wood before cutting, ensuring precise dimensions.
    • Level: A level ensures that the box is built straight, enhancing its stability and aesthetics.
    • Hammer: A hammer may be necessary for driving in nails if you’re opting for a traditional construction method.
    • Safety glasses: Always protect your eyes from flying debris while working with wood. Safety first!
    • Optional: You can add extra touches like a metal roof for longevity or a small branch for squirrels to access the box. Consider using a weather-resistant paint or stain to enhance the durability and aesthetics of your squirrel box.

    Building Your Squirrel Box

    Now that you’ve gathered all the materials, let’s embark on the actual construction process. This step-by-step guide will walk you through the process, making it easy to create a welcoming home for your furry friends.

    Step 1: Cut the Wood

    Begin by cutting the wood to the desired dimensions. The recommended dimensions for a squirrel box are roughly 12” wide, 12” deep, and 16” tall. This provides adequate space for a family of squirrels while maintaining a cozy atmosphere.

    Step 2: Assemble the Sides

    Lay out the four side panels and secure them together using screws. Ensure the bottom corners are square and that the panels are flush. Use a level to ensure the sides are vertical and even.

    Step 3: Attach the Base

    Next, secure the base to the bottom edge of the sides. Use screws to attach it firmly, ensuring a stable foundation for the box.

    Step 4: Create the Roof

    To build the roof, cut two pieces of wood to fit the length and width of the box. These will be the roof panels. Connect these panels with hinges to create a hinged roof that can easily be opened for cleaning or inspecting the box.

    Step 5: Attach the Roof

    Carefully place the hinged roof onto the box and attach it to the top of the sides using screws. Make sure the hinges are positioned so that the roof opens freely.

    Step 6: Cut the Entrance Hole

    Using a saw, carefully cut a circular hole in the front panel of the box. This will be the entrance for the squirrels. The ideal hole size is approximately 3-4 inches in diameter. You can create a more rustic look by using a jigsaw to cut the hole in a rounded shape.

    Step 7: Finishing Touches

    Once you’ve built the basic structure, consider adding some finishing touches. You can add a metal roof for extra protection against the elements. Also, consider attaching a small branch to the front of the box, providing the squirrels with a convenient way to access the entrance.

    Placing Your Squirrel Box

    After the construction is complete, it’s time to find the perfect location for your squirrel box. Follow these tips for placing it:

    • Height: Place the box 6-10 feet off the ground. This provides a safe distance from predators and allows squirrels to easily access it.
    • Location: Choose a location with ample shade, protecting the squirrels from harsh sun and rain. Ideally, find a spot near trees so squirrels can easily access the box.
    • Orientation: Ensure the entrance hole faces away from prevailing winds and direct sunlight. A south-facing location offers good sunlight exposure, but shield it from the afternoon sun.
    • Security: Mount the box to a sturdy tree or post using strong screws or brackets. This will prevent it from falling or being disturbed by strong winds.

    Enjoying Your Squirrel Box

    Once your squirrel box is in place, the fun really begins! Observe the squirrels as they explore their new home. You may even notice them bringing in nesting materials and setting up a family within the box. Remember to maintain your squirrel box by cleaning it regularly, especially during the spring and fall seasons when squirrels are actively nesting. Enjoy the charming presence of these playful creatures as they become regular visitors to your backyard. Building a squirrel box is a simple and rewarding project that brings you closer to the beauty of nature.

    DIY Bedside Cabinet: A BeginnerÂ’s Guide with Free PDF Plans

    DIY Bedside Cabinet: A Beginner’s Guide with Free PDF Plans

    DIY Bedside Cabinet: A Beginner's Guide with Free PDF Plans

    Hey there, fellow furniture enthusiast! Tired of those boring, mass-produced bedside tables? Ever dreamt of crafting your own, unique piece that perfectly complements your bedroom? Well, you're in the right place! This guide will walk you through the exciting journey of building a DIY bedside cabinet, from choosing the right materials to achieving that satisfying "finished project" feeling. And guess what? I've got a **free PDF plan** just for you, so you can start building ASAP!

    Why Build Your Own Bedside Cabinet?

    Building your own furniture isn't just about saving money (though it definitely is!), it's about creating something truly personal. You get to choose the exact style, size, and features that fit your needs and personality. Imagine a bedside table with the perfect drawer depth for your books, a hidden compartment for your phone charger, or even a built-in reading lamp! The possibilities are endless.

    Gathering Your Materials

    Before you start hammering and sawing, you'll need to gather your supplies. This includes:

    Wood:

    • Plywood: A good all-around choice for building furniture. It's strong, stable, and affordable. You'll need 1/2" or 3/4" plywood, depending on your design.
    • Hardwood: For a more elegant look, consider using hardwoods like oak, maple, or cherry. These woods are durable and beautiful, but they're also more expensive.

    Hardware:

    • Screws: Choose screws that are long enough to penetrate the wood properly, and use a variety of sizes for different parts.
    • Drawer slides: Ensure you get the right size for your drawers, and consider soft-close slides for a luxurious touch.
    • Knobs or handles: The choice is yours! Go for something stylish and functional that complements the overall design of your bedside cabinet.
    • Wood glue: Use a strong wood glue to bond the pieces together. It's recommended to use a wood glue that's specifically designed for furniture.
    • Finish: Choose a finish that protects your wood and enhances its beauty. Some popular options include paint, stain, or oil.

    Tools:

    • Circular saw or table saw: For accurate cuts, you'll need a saw. If you're a beginner, a circular saw is more manageable.
    • Measuring tape: Essential for precise cuts and measurements. Don't forget your trusty ruler!
    • Pencil or marker: For marking your cuts and transferring your measurements.
    • Drill: For pre-drilling holes and attaching hardware.
    • Screwdriver: For tightening screws.
    • Clamps: To secure the pieces while they're being glued and dried.
    • Sandpaper: For smoothing out any rough edges and preparing the wood for finishing.

    Building Your Bedside Cabinet

    Now, it's time to get your hands dirty (or should we say, sawdust-y)! Let's break down the building process, step-by-step:

    1. Review the Plans:

    Download your free PDF plans and familiarize yourself with them. They will guide you through each cut, measurement, and assembly step.

    2. Cut the Wood:

    Carefully cut the plywood or hardwood boards to the dimensions outlined in the plans. Use a measuring tape and your saw to make precise cuts.

    3. Assemble the Frame:

    Following the plans, assemble the main frame of your bedside cabinet. Glue and screw the pieces together, ensuring the joints are strong and secure. Use clamps to hold the pieces in place while the glue dries.

    4. Build the Drawers:

    Cut the wood for the drawers to the size indicated in the plans. Assemble the drawer boxes and attach the drawer slides. Don't forget to test the drawers for smooth operation!

    5. Install the Drawers:

    Fit the drawers into their designated spaces in the bedside cabinet frame. Make sure they slide smoothly and close properly.

    6. Sanding and Finishing:

    After assembling your cabinet, sand down all the surfaces to remove any imperfections and create a smooth finish. This will make your cabinet look more professional and ensure your finish goes on smoothly.

    Next, apply your chosen finish. If you're painting, apply a few coats of paint, allowing each coat to dry completely before applying the next. If you're staining, apply the stain evenly and let it soak in before wiping off the excess. A finishing coat of polyurethane or varnish will protect your cabinet from scratches and spills.

    7. Add Hardware:

    Finally, install your chosen knobs or handles. This is a great opportunity to add a personal touch to your creation!

    Safety First

    Remember to always prioritize safety when working with power tools. Wear safety glasses and ear protection, and use clamps to secure your workpieces. Read your tools' instructions carefully and only use them as intended.

    Tips for Success

    Building your own bedside cabinet can be a truly rewarding experience. Here are a few tips to help you achieve success:

    • Start Small: If you're a beginner, start with a simpler design to gain confidence. You can gradually build more complex pieces as you become more experienced.
    • Measure Twice, Cut Once: Always double-check your measurements before making cuts. It's better to be safe than sorry!
    • Don't Be Afraid to Ask for Help: If you're stuck or need clarification, don't hesitate to ask for help from a more experienced woodworker or a fellow DIYer.
    • Take Breaks: Working on a project can be tiring. Step away from it occasionally to rest your eyes and avoid mistakes.
    • Most Importantly, Have Fun! Building your own furniture is a rewarding experience, so relax, enjoy the process, and be proud of your creation.

    Your Bedside Cabinet Awaits!

    Building your own bedside cabinet is an exciting adventure! It's a chance to unleash your creativity and design a piece that's perfectly suited to your space and style. With these tips and your free PDF plans, you'll be crafting your own unique bedside cabinet in no time!

    Happy building!

    Downloadable Squirrel Box Plans with Tips for Success

    Downloadable Squirrel Box Plans with Tips for Success

    Want to Attract Squirrels to Your Yard? Build a Squirrel Box!

    Hey there, fellow nature lover! Are you tired of seeing those adorable squirrels scampering around, seemingly without a home? Well, you’re in luck! Building a squirrel box, also known as a squirrel feeder or nesting box, is a fun and rewarding project that can attract these furry creatures to your backyard. Not only will you get to observe them up close, but you'll also be providing them with a safe and secure place to nest, raise their young, and weather the elements. So grab your tools, and let's get started!

    Choosing the Right Design

    Before you start hammering and sawing, it’s important to pick the right squirrel box design for your needs. Here are a few things to consider:

    Size and Shape

    Squirrel boxes come in all shapes and sizes, but a standard box is typically 12 inches wide, 12 inches deep, and 18 inches high. This size provides enough space for the squirrels to move around comfortably and raise their young. You can find plans for square, rectangular, or even cylindrical boxes. The shape is mostly a matter of personal preference, but remember that a round box will be more difficult for squirrels to enter and exit.

    Materials

    Squirrel boxes can be made from a variety of materials, but wood is the most popular choice. It’s durable, easy to work with, and provides good insulation. You can use pressure-treated wood for outdoor durability or pine or cedar, which are naturally resistant to decay. Avoid using plywood or particleboard, as they can deteriorate quickly. If you're concerned about the environmental impact, consider using reclaimed or repurposed wood.

    Entry Hole Size

    The size of the entry hole is crucial for attracting the right type of squirrel. For eastern gray squirrels, a 3-inch diameter hole is ideal. If you live in an area with fox squirrels, you may want to use a 4-inch hole. Keep in mind that a larger hole can attract other animals like birds or raccoons, so choose the size that best suits your local squirrel population.

    Location and Placement

    The location of your squirrel box is just as important as its design. It's important to pick a spot that provides shade and shelter from the elements. You also want to make sure the box is accessible to squirrels but not too easily accessible to predators.

  • Height: Place the box 10-15 feet above the ground, to deter ground predators like cats and dogs.
  • Orientation: Mount the box with the entry hole facing away from the prevailing wind and rain.
  • Safety: Ensure the box is securely mounted and the surrounding area is clear of obstacles.
  • Squirrel Box Plans: Downloadable and Easy to Follow

    Now that you have a basic understanding of squirrel box design, you’re ready to dive into some plans. There are tons of free and downloadable plans available online. Here are a few resources to get you started:

  • The National Audubon Society: This website has a wealth of information on wildlife, including a comprehensive guide to building a squirrel box.
  • Project FeederWatch: This citizen science project provides information on attracting birds and other wildlife, including squirrels. They have a helpful guide to building a squirrel box that includes a downloadable plan.
  • DIY Websites: Websites like Ana White, Instructables, and Pinterest are treasure troves of DIY projects, including squirrel box plans.
  • Essential Building Materials and Tools

    Building a squirrel box is a relatively simple project, but you will need a few essential materials and tools:

    Materials:

  • Wood: 1 x 6 or 1 x 8 pressure-treated lumber, pine or cedar. You'll need enough wood to build a box with a floor, roof, sides, and back.
  • Screws: Galvanized screws, at least 2 inches long.
  • Wood glue: For extra strength and durability.
  • Metal flashing: To protect the roof from the elements.
  • Paint or stain: (Optional) To protect the wood and give your box a more aesthetically pleasing look.
  • Tools:

  • Saw: A circular saw or jigsaw.
  • Drill: A cordless drill with a variety of drill bits.
  • Tape measure: For accurate measurements.
  • Level: To ensure your box is straight and level.
  • Screwdriver: For fastening screws.
  • Hammer: For securing metal flashing.
  • Safety glasses: To protect your eyes.
  • Gloves: To protect your hands.
  • Tips for Squirrel Box Success

    Building a squirrel box is a rewarding experience, but there are a few things you can do to increase your chances of attracting squirrels:

  • Choose the right location: Select a spot that is high, sheltered, and accessible to squirrels.
  • Provide nesting material: Squirrels need nesting material to build their nests. You can add shredded paper, cloth, or wood shavings to the box.
  • Offer food: While squirrels can find their own food, you can attract them to your yard by offering nuts, seeds, or fruits.
  • Keep the box clean: Squirrels prefer clean and dry nesting boxes. Remove any old nests or debris before the start of the breeding season.
  • Be patient: It may take some time for squirrels to discover and use your box. Don't give up if you don't see them right away.
  • Enjoy Your New Squirrel Neighbors!

    Once your squirrel box is built and placed in a suitable location, you can sit back and enjoy the show! Squirrels are fascinating creatures to watch, and they can bring a lot of joy to your backyard. Building a squirrel box is a great way to connect with nature and provide a safe haven for these adorable animals. Remember to be patient, observe their behavior, and appreciate the wonders of the natural world. Happy squirrel watching!

    Free PDF Plans for a Compact Compost Bin

    Free PDF Plans for a Compact Compost Bin

    Free PDF Plans for a Compact Compost Bin

    Transform your yard waste into nutrient-rich compost with a compact and efficient composting bin. This guide provides free PDF plans for a simple, compact compost bin that can be built with readily available materials. With detailed instructions and diagrams, you can easily construct your own composting system and enjoy the benefits of sustainable gardening.

    Benefits of Composting

    Composting offers numerous advantages for both your garden and the environment:

    • Enhances soil fertility: Compost adds essential nutrients, improves soil structure, and increases water retention, creating a healthy environment for plant growth.
    • Reduces waste: Instead of sending yard waste to landfills, composting diverts it from the waste stream, reducing environmental impact.
    • Saves money: Composting provides a free and natural source of fertilizer, eliminating the need to purchase expensive chemical fertilizers.
    • Promotes sustainability: By composting, you contribute to a more sustainable lifestyle, reducing your environmental footprint.

    Materials for Building a Compact Compost Bin

    To build a compact compost bin, you will need the following materials:

    • Wood: Choose weather-resistant wood like cedar, redwood, or pressure-treated lumber. You will need approximately 8-10 boards, each 8 feet long and 6 inches wide.
    • Screws: Use galvanized screws or stainless steel screws for long-lasting durability.
    • Brackets or corner braces: These will strengthen the structure of the bin.
    • Optional: A piece of hardware cloth or chicken wire to create a screen for the bottom of the bin, allowing for drainage and aeration. You can use a large piece of landscape fabric as an alternative to chicken wire.

    Step-by-Step Instructions for Building a Compact Compost Bin

    Follow these instructions to build a compact compost bin:

    1. Cut the Wood

    Cut the wood boards into the following lengths:

    • 4 boards: 3 feet long
    • 4 boards: 2 feet long

    2. Construct the Base

    Assemble the base of the bin using the 4 boards that are 3 feet long. Position them to form a square or rectangle, and secure them together with screws and brackets.

    3. Add the Sides

    Attach the 4 boards that are 2 feet long to the base, creating the sides of the bin. Make sure they are evenly spaced and secured with screws.

    4. Create the Lid

    Cut two of the 3-foot boards into 2-foot lengths. These will be the front and back of the lid. Attach them together with screws, forming a rectangular frame. Use the remaining 3-foot board to create a lid, attaching it to the frame with screws.

    5. Add Drainage and Aeration (Optional)

    If you are using hardware cloth or chicken wire, cut a piece slightly larger than the base of the bin. Attach it to the bottom of the bin using screws or staples. This will allow for drainage and aeration.

    6. Finish the Bin

    Sand the edges of the wood to create a smooth surface. You can stain or paint the bin to protect it from weather and enhance its appearance.

    Operating and Maintaining Your Compost Bin

    Follow these tips for successful composting:

    • Choose the right location: Place your compost bin in a shaded area that receives regular rainfall.
    • Maintain a balance of materials: Use a mix of "greens" (nitrogen-rich materials like kitchen scraps and grass clippings) and "browns" (carbon-rich materials like leaves, twigs, and shredded paper) to achieve a good balance of nutrients and promote proper decomposition.
    • Turn the compost regularly: Every few weeks, use a shovel to turn the compost, ensuring even distribution of materials and oxygenation.
    • Monitor moisture levels: Keep the compost moist but not soggy. Add water as needed to maintain optimal conditions.
    • Harvest finished compost: Once the compost has decomposed into a rich, dark brown material, you can harvest it and use it in your garden.

    Download Free PDF Plans

    To download free PDF plans for a compact compost bin, click the link below. The plans include detailed instructions, diagrams, and a materials list.

    [Link to PDF plans]

    Conclusion

    Building your own compact compost bin is a rewarding and eco-friendly project. With these free PDF plans and step-by-step instructions, you can easily transform your yard waste into valuable compost, enriching your garden and contributing to a more sustainable lifestyle.

    Squirrel Den Box Building Tips for Beginners

    Squirrel Den Box Building Tips for Beginners

    Building Squirrel Den Boxes: A Guide for Beginners

    Providing safe and comfortable shelter for squirrels is an excellent way to support local wildlife and enhance your backyard ecosystem. Building a squirrel den box is a rewarding project for beginners, requiring basic carpentry skills and readily available materials. This guide will walk you through the steps of constructing a squirrel den box, emphasizing safety and comfort for these playful creatures.

    Choosing the Right Location

    Before you start building, it’s essential to select the perfect location for your squirrel den box. Consider these factors:

    Sunlight and Shade

    Squirrels prefer locations that offer both sun and shade throughout the day. Choose a spot that receives morning sun and afternoon shade to prevent overheating during summer. Avoid placing the box directly under dense foliage, which can attract predators.

    Height and Accessibility

    Mount the den box at a height of 10-15 feet above the ground. This will help deter predators and provide the squirrels with a clear view of their surroundings. Install the box on a sturdy tree trunk, fence post, or other suitable structure. Ensure the box is accessible to squirrels, with branches or other natural structures allowing them to reach the entrance.

    Predator Protection

    Position the den box in a location that minimizes the risk of predation. Avoid placing it near areas frequented by cats, dogs, or other predators. Consider using a baffle or a predator guard to discourage access by unwanted visitors. Additionally, ensure the box is firmly attached to prevent it from swaying or falling.

    Designing and Building the Den Box

    Squirrel den boxes come in various shapes and sizes, but a basic rectangular design with a single entrance hole is suitable for most species. Here are the essential components and construction steps:

    Materials

    • Wood: Use weather-resistant wood like cedar, redwood, or treated pine. Avoid using pressure-treated lumber, as it can contain chemicals harmful to squirrels.
    • Screws or nails: Use galvanized or stainless steel screws or nails for durability.
    • Saw: A circular saw or a hand saw is required for cutting the wood.
    • Drill: A cordless drill with a selection of drill bits is useful for pre-drilling holes and attaching components.
    • Measuring tape and pencil: Essential for accurate measurements and marking.
    • Safety gear: Always wear safety glasses, gloves, and hearing protection during construction.

    Dimensions and Construction

    Here are general dimensions for a squirrel den box:

    • Length: 12 inches
    • Width: 10 inches
    • Height: 12 inches
    • Entrance hole: 3 inches in diameter

    Step 1: Cut the wood:

    • Cut two side pieces, each 12 inches long and 10 inches wide.
    • Cut two end pieces, each 12 inches long and 10 inches wide.
    • Cut a bottom piece, 12 inches long and 10 inches wide.
    • Cut a roof piece, 12 inches long and 12 inches wide.

    Step 2: Assemble the box:

    • Attach the side pieces to the end pieces, forming the four sides of the box.
    • Secure the bottom piece to the sides, creating a solid base.
    • Create an overhang for the roof by attaching two small pieces of wood (approximately 1 inch by 2 inches) to the top of the side pieces. This will provide a small overhang for the roof.
    • Attach the roof piece to the overhangs, ensuring a secure fit.

    Step 3: Cut the entrance hole:

    • Use a drill to create a pilot hole for the entrance hole.
    • Cut a 3-inch diameter circular hole in one of the side pieces, approximately 4 inches from the top of the box.

    Additional Features

    For added comfort and safety, consider incorporating these features:

    • Interior roosting platform: Install a small platform inside the box, about 4 inches from the bottom, to provide a dry and comfortable place for the squirrels to rest.
    • Drainage holes: Drill a few small holes in the bottom of the box to allow for drainage and prevent moisture buildup.
    • Predator guard: Construct a predator guard by attaching a metal sheet around the base of the box to deter predators.

    Installation and Maintenance

    Once the den box is built, it's time to install it and prepare for its new tenants.

    Installation

    • Secure mounting: Mount the box securely to the chosen structure using heavy-duty screws or brackets. Ensure the box is level and stable.
    • Access for squirrels: Ensure squirrels have easy access to the entrance hole by providing nearby branches or other natural structures they can use to climb to the den box.
    • Consider a baffle: Install a baffle to discourage predators from climbing to the box, if necessary.

    Maintenance

    Regular maintenance will help keep the squirrel den box safe and comfortable for its inhabitants.

    • Annual inspection: Inspect the box annually for signs of wear and tear, such as cracks, loose screws, or rotting wood. Replace any damaged parts as needed.
    • Cleaning: Clean the box in the late fall or winter when squirrels are not actively using it. Remove any accumulated debris or nests using a brush or vacuum cleaner.
    • Safety: Avoid disturbing the squirrels while they are using the den box. Only clean or repair it when the squirrels are not present.

    Conclusion

    Building a squirrel den box is a fulfilling project that provides valuable shelter and support for these charming and intelligent creatures. By following these guidelines, you can create a safe and comfortable haven for squirrels in your backyard, enriching your local ecosystem and enjoying the pleasure of witnessing their playful antics. Remember to always prioritize the safety and well-being of the squirrels, and enjoy the satisfaction of contributing to their conservation.

    How to build a large wooden wall clock for beginners

    How to build a large wooden wall clock for beginners

    Building a Large Wooden Wall Clock for Beginners

    Embarking on a woodworking project can be a fulfilling and rewarding experience, especially when you see the finished product come to life. Creating a large wooden wall clock is a fantastic project for beginners, allowing you to exercise your creativity and design skills while learning valuable woodworking techniques. This guide will take you step-by-step through the process of building a large wooden wall clock, from choosing materials to assembling the final masterpiece.

    Materials and Tools

    Before you start, gather the necessary materials and tools. This list provides a comprehensive overview, but you may need to adjust it based on your specific design and preferences.

    Materials

    • Wooden board (plywood or solid wood) for the clock face
    • Wooden strips for the frame (optional)
    • Clock movement kit (including hands, mechanism, and mounting hardware)
    • Clock numbers (Roman numerals, Arabic numerals, or decorative designs)
    • Wood glue
    • Wood stain or paint (optional)
    • Clear varnish or sealant (optional)
    • Screws or nails
    • Sandpaper (various grits)

    Tools

    • Saw (circular saw, jigsaw, or handsaw)
    • Drill
    • Measuring tape
    • Pencil
    • Clamps
    • Level
    • Hammer
    • Screwdriver
    • Safety glasses
    • Dust mask
    • Work gloves

    Designing the Clock

    The first step is to design your clock. Consider the following factors:

    • Size: Determine the desired size of your clock face, keeping in mind the wall space it will occupy. A larger clock generally requires a more robust frame and mechanism.
    • Shape: You can opt for a traditional circular design or explore more creative shapes like squares, rectangles, or even whimsical designs.
    • Style: Consider the style you want to achieve. Do you want a rustic, modern, minimalist, or ornate design?
    • Numbers: Choose the type of numbers you want to use, such as Roman numerals, Arabic numerals, or even decorative motifs.
    • Frame: Decide whether you want a frame around the clock face and what material and style to use.

    Preparing the Clock Face

    Once you have finalized your design, prepare the wooden board for the clock face:

    1. Measure and Cut: Use your measuring tape and saw to cut the wooden board to the desired size and shape. Ensure the edges are smooth and even.
    2. Sanding: Sand the surface of the board thoroughly using sandpaper of progressively finer grits. This will remove any imperfections and create a smooth surface for painting or staining.
    3. Center Point: Use a compass or a pencil and ruler to mark the exact center point of the clock face. This is where the clock movement will be mounted.

    Constructing the Frame (Optional)

    If you're adding a frame, follow these steps:

    1. Cut Frame Pieces: Measure and cut wooden strips to the desired length for the frame. Ensure the frame pieces are long enough to create a border around the clock face.
    2. Assemble the Frame: Use wood glue and clamps to join the frame pieces together. Let the glue dry completely before proceeding.
    3. Attach to Clock Face: Once the frame is assembled, secure it to the clock face using screws or nails. Ensure the frame is centered and aligned correctly.

    Installing the Clock Movement

    The clock movement kit contains the mechanism that powers the hands and keeps time. Follow these steps to install it:

    1. Drill Pilot Holes: Drill pilot holes at the center point of the clock face where the clock movement will be mounted. The holes should be slightly smaller than the screws provided in the kit.
    2. Mount Clock Movement: Attach the clock movement to the clock face using the provided screws. Ensure it is mounted securely and centered.
    3. Attach Hands: Insert the clock hands onto the spindle of the clock movement, following the instructions provided in the kit. Ensure they are securely attached and aligned correctly.

    Adding Clock Numbers and Decoration

    Now it's time to add the clock numbers and any decorative elements you desire:

    1. Position Numbers: Use a compass or ruler to mark the positions for the clock numbers. Ensure they are evenly spaced around the clock face.
    2. Attach Numbers: Secure the clock numbers using wood glue or a suitable adhesive. Allow the glue to dry completely.
    3. Additional Decoration: If you want to add decorative elements, such as embellishments or designs, apply them according to your plan. Ensure they are securely attached and complement the overall style of the clock.

    Finishing Touches

    Give your clock a final touch to enhance its appearance and protect the wood:

    1. Sanding: Lightly sand the surface of the clock to smooth out any rough edges or imperfections. This will ensure a smooth finish for staining or painting.
    2. Staining or Painting: If desired, apply a wood stain or paint to the clock face and frame. Choose a color that complements your design and style. Allow the stain or paint to dry completely before proceeding.
    3. Varnishing or Sealing: Apply a clear varnish or sealant to protect the wood and enhance its finish. This will help to prevent damage from water or scratches. Allow the varnish or sealant to dry completely before hanging the clock.

    Hanging the Clock

    Finally, hang your finished clock on the wall:

    1. Choose Location: Select a suitable location for your clock, ensuring it is level and well-lit. Consider the height and placement so that the clock is visible and accessible.
    2. Install Hanging Mechanism: Most clock movement kits come with a hanging mechanism. Follow the instructions to install it securely to the back of the clock.
    3. Hang the Clock: Use a level to ensure the clock is hanging straight and centered. Secure it to the wall using the provided hardware or a suitable hanging method.
    4. Set the Time: Once the clock is hung, set the time using the hands or the clock movement's controls.

    Conclusion

    Congratulations! You have successfully built a large wooden wall clock for your home. This project has allowed you to explore your creativity, enhance your woodworking skills, and create a unique and personalized timepiece. Remember to take your time, be patient, and enjoy the process. As you gain more experience, you can experiment with different designs, materials, and finishing techniques to create even more intricate and personalized clocks.