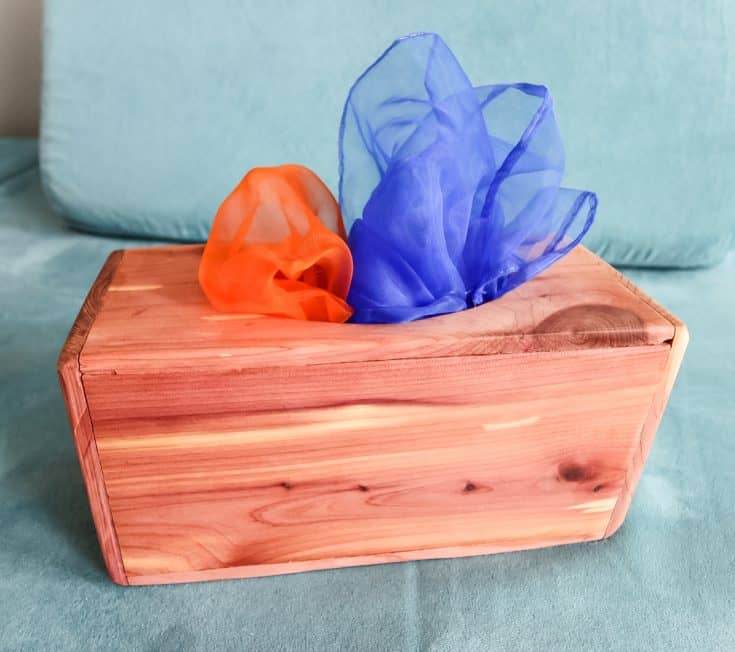
DIY Magic Box: Step-by-Step Woodworking Instructions
This guide will walk you through the process of crafting your own enchanting magic box. It's a delightful woodworking project suitable for beginners and seasoned woodworkers alike. This box can be personalized with your preferred design, adding a touch of whimsical magic to your home or as a unique gift for a special someone.
Materials
Before you begin, ensure you have all the necessary materials. You can adjust the dimensions to create a box of your desired size.
- Wood (Pine, Alder, Maple, or your preferred species) â€" 1/4" thick x 12" x 12" (adjust as needed)
- Wood Glue
- Wood Stain (Optional, but enhances the look)
- Wood Finish (Polyurethane, Shellac, or Wax)
- Sandpaper (80 Grit, 120 Grit, 220 Grit)
- Measuring Tape
- Pencil
- T-Square (or Ruler for accurate measurements)
- Miter Saw or Table Saw (for precise cuts)
- Clamps
- Screwdriver or Drill (with appropriate bits)
- Small Hinges (2 pairs)
- Small Magnetic Clasp (for securing the lid)
- Decorative elements (optional - beads, paint, decoupage papers)
Preparation and Cutting
Preparing Your Wood
Start by sanding the wood with 80 grit sandpaper to create a smooth surface. This helps remove any imperfections and prepares the wood for cutting.
Cutting the Pieces
Carefully measure and cut the following pieces from your wood using a miter saw or table saw, ensuring precise cuts for a well-fitting box.
- Bottom Piece: 6" x 6"
- Side Pieces (4): 6" x 2.5"
- Lid Pieces (2): 6" x 2.5"
- Lid Top Piece: 6" x 6"
Note: Adjust these dimensions to fit your desired box size.
Assembling the Box
Creating the Base
1. Apply wood glue to the edges of the bottom piece. 2. Align the four side pieces along the edges of the bottom piece, ensuring all corners are square. 3. Secure the pieces with clamps, ensuring a strong bond. 4. Allow the glue to dry completely as per the manufacturer's instructions.
Attaching the Lid
1. Apply wood glue to the edges of the lid pieces (two pieces). 2. Attach them to the base to create a frame for the lid. 3. Clamp the pieces together, ensuring a tight and even fit. 4. Allow the glue to dry thoroughly.
Attaching the Lid Top
1. Apply wood glue to the edges of the lid top piece. 2. Carefully place the lid top piece onto the lid frame. 3. Secure with clamps, making sure all corners are aligned. 4. Let the glue dry completely.
Finishing Touches
Sanding and Finishing
1. After the glue has dried, sand the entire box with 120 grit sandpaper, followed by 220 grit sandpaper. This removes any rough edges and creates a smooth finish. 2. Apply your preferred wood stain (optional) for a richer look. 3. Apply a wood finish, such as polyurethane, shellac, or wax, for protection and a polished look.
Adding Hinges
1. Mark the positions for the hinges on the lid and the box. 2. Attach the hinges to the lid and the box using screws. 3. Carefully test the hinge movement, ensuring smooth operation.
Adding a Magnetic Clasp
1. Choose a location for the magnetic clasp on the lid and the box. 2. Attach the magnetic clasp components to the designated spots using screws or glue (as instructed by the clasp's manufacturer).
Embellishing Your Magic Box (Optional)
If you wish to add decorative touches, consider incorporating:
- Paint: Acrylic paints can add vibrant colors and patterns.
- Decoupage: Use decoupage papers, napkins, or fabric to create unique textures and designs.
- Beads: Attach decorative beads or embellishments to the box for a whimsical feel.
- Carvings: If you're comfortable with woodworking, add intricate carvings or decorative designs to the box.
Conclusion
Congratulations! You've crafted a captivating magic box, ready to hold your cherished secrets, trinkets, or even a whimsical spellbook. Whether you decide to keep it for yourself or gift it to someone special, this DIY project is sure to bring a touch of magic and joy. Remember, the magic is in the detail and the effort you put into it. So, have fun, unleash your creativity, and enjoy the process of creating your own enchanting masterpiece!
0 comments:
Post a Comment
Note: Only a member of this blog may post a comment.